Scanning Metadata
After creating systems and environments, the next logical step is to scan source and target metadata. Ensure that the environment database type and connection parameters are correct and the environment is able to establish connection with the database.
To scan source or target metadata, follow these steps:
- Go to Application Menu > Data Catalog > Metadata Manager > Explore.
- On the Explore tab, click an environment tile.
- Click Options.
The available options appear. - Click Scan Metadata.
- In the Database Schema(s) pane, select the database schemas.
- In the Metadata Content pane, select the appropriate Import Metadata Options.
- Click
 .
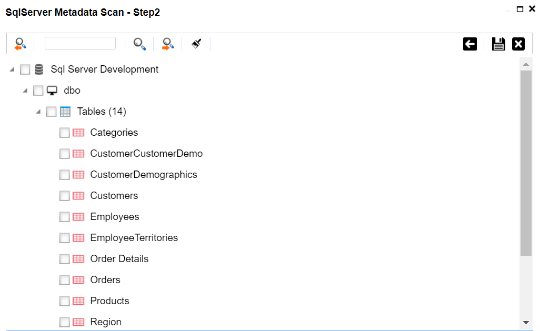
. - Select the required objects.
- Click
 .
.

The <Data_Base> Metadata Scan-Step1 page appears. For example, if it is the SQL Server environment, then the SqlServer Metadata Scan - Step1 page appears.
Refer to the following table for the descriptions of the metadata import options.
|
Import Metadata Options |
Description |
|---|---|
|
Add New |
This option adds new objects to the existing object list. The existing metadata is not updated. |
|
Update Existing + Add New |
This option adds new objects to the existing list and at the same time the existing metadata is also updated. |
|
Update Existing + Add New + Invalidate |
This option adds new objects to the existing list, updates existing and invalidates table/column during the scanning process. |
|
Delete & Reload |
This option deletes all existing metadata and scans only the new objects that have been selected. |
|
Import Comments |
Select the check box to import comments. |
|
Import Sensitive Data |
Select the check box to import sensitivity classification of the metadata from the data source.
This option is available for SQL, Oracle, and Snowflake environments. |
|
Table(s) |
Select the check box to import Tables. |
|
View(s) |
Select the check box to import Views. |
|
Synonym(s) |
Select the check box to import Synonyms. |
|
Version Environment |
Select the check box to create a version of the environment. |
The <Database_Name> Metadata Scan Step-2 page appears. It pulls up the objects selected in Metadata Scan Step-1, such as Tables, Views and Synonyms.
The metadata is scanned successfully and saved under the environment node.
The above method is applicable for most datasources. Apart from that, you can also import metadata from:
|
Copyright © 2026 Quest Software Inc. |